 | ||||
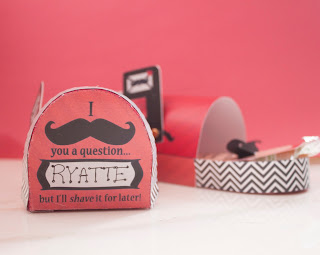
| A mailbox...the perfect addition to the I mustache you a question... Valentine's Collection |
I went and got them printed so I could post an assembly tutorial for you!
First you need to get your supplies:
- Scissors
- Adhesive (glue stick or double sided tape)
- Fastener (I used a brass brad fastener from the office supply store...you could use a more decorative one from the scrapbook supply store)
- The prints, I went and got mine printed on cardstock at a local print shop
Oh! You're back! Great! Let's get started.
First make sure you have all your prints. I'm making two mailboxes so there should be 4 pages - 2 per mailbox.
 |
| All pages accounted for! |
Then start folding...Fold along the dotted lines and the top and bottom edges of the main body
 | |
| I also curled the rims and main body by rolling them up a little |
 | |
| see how it can stand on it's own since I folded the ends under |
Set that aside and grab the body and fold the back portion over the body and attach with glue or tape
 | |
| I found it easier to go OVER the outside as opposed to gluing to the inside...don't worry it'll be covered with a rim later |
 |
| I'm not really left handed but I had to take pictures with my right hand! lol |
 |
| I preferred folding the edges over the bottom instead of to the outside, it gives it a prettier edge |
And now the final step!! Fold the flag over and secure with your adhesive of choice. Then take that fastener and stab it through the bottom of the flag then through the body of the mailbox where there's a white circle.
Fold the fastener ends over to secure it and Voila! You have an adorable mailbox for Valentine's Day! Complete with working flag!

Page 1
Page 2
I hope you enjoy this and please check out the rest of the I mustache you a question.. Valentine's Collection on Etsy!!


No comments:
Post a Comment